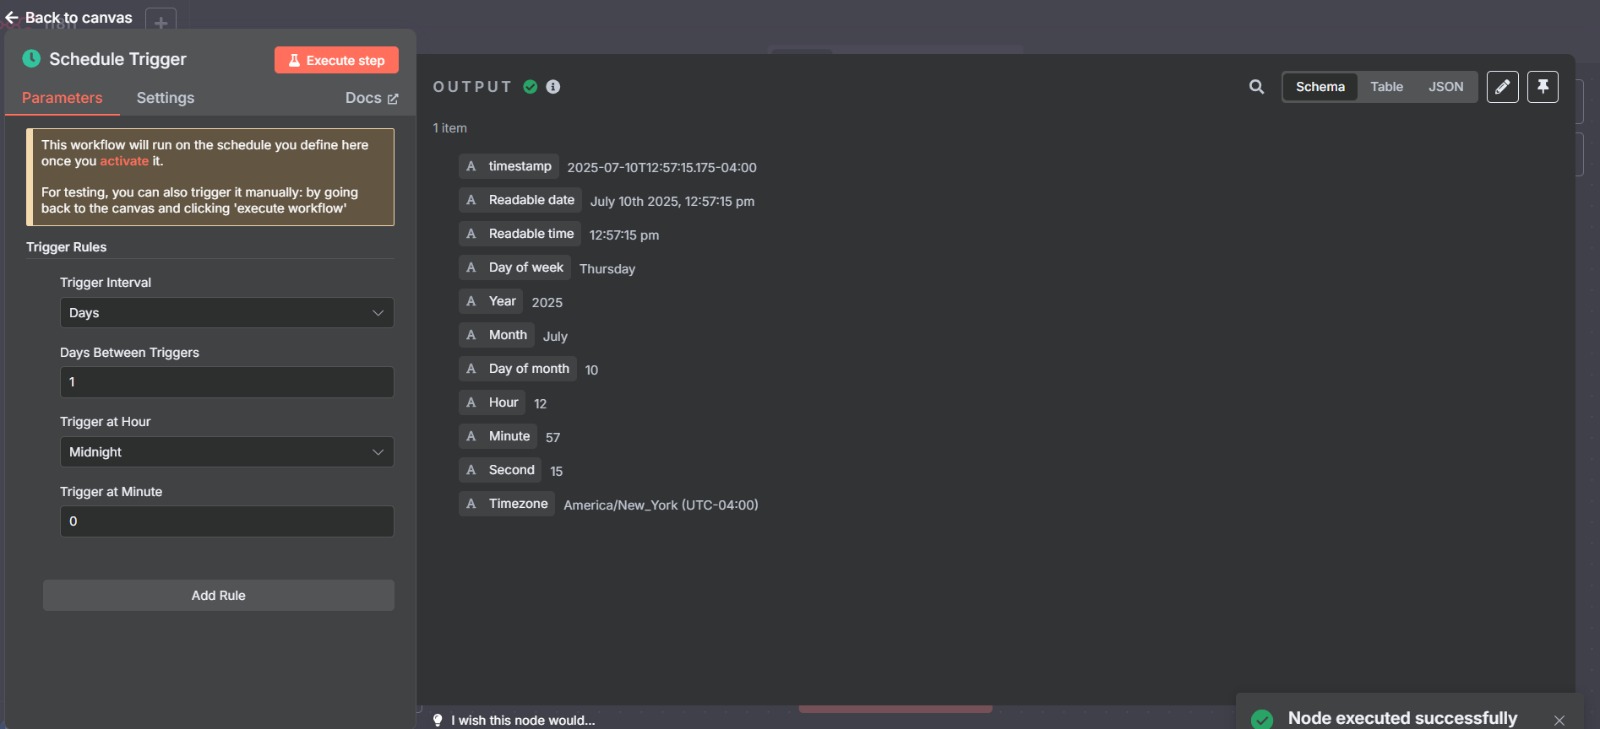
In this blog, we'll walk through setting up a simple yet powerful automation workflow in **n8n**. We'll cover: - Using the **Schedule Trigger** to run tasks automatically - Setting up credentials for **Google Sheets** - Setting up credentials for **Google Drive** Whether you're automating reports, syncing files, or updating sheets daily, these foundational steps will kickstart your no-code automation journey. Easily deploy the n8n workflow automation tool in just a few clicks using [Nife.io](https://nife.io/) Explore the step-by-step [guide](https://docs.nife.io/docs/Guides/how-to-deploy-n8n-from-the-marketplace/) to deploy the n8n application and start automating your processes today. ## Step 1: Adding the Schedule Trigger <img src={require('./img/n8n-trigger.jpeg').default} alt="Diagram illustrating Nginx's role as a web server, reverse proxy, and load balancer" width="700" height="400"/> <br/> 1. In your n8n workflow canvas, add the **Schedule Trigger** node. 2. Configure it based on your desired frequency: - For daily runs, select **"Every Day"** and set the time. - For testing, you can choose **"Every Minute"** to observe immediate executions. > **Why this is important:** > The Schedule Trigger ensures your workflow runs **automatically at set intervals** without manual intervention. ## Step 2: How to Acquire OAuth Client ID & Client Secret from Google Cloud Before setting up credentials in n8n, you need your **Client ID and Client Secret** from Google Cloud Platform (GCP). ### Step-by-Step Guide: 1. **Go to Google Cloud Console** Visit [console.cloud.google.com](https://console.cloud.google.com). 2. **Create a New Project (if needed)** - Click the project dropdown on the top bar. - Click **“New Project”**, give it a name, and create it. 3. **Enable the Required APIs** - From the left sidebar, go to **APIs & Services → Library**. - Search for **Google Sheets API** and click **Enable**. - Search for **Google Drive API** and click **Enable**. 4. **Configure OAuth Consent Screen** - Go to **APIs & Services → OAuth consent screen**. - Select **External** or **Internal** based on your account type. - Fill in **App Name**, **User Support Email**, and **Developer Contact Email**. - Under **Scopes**, add the following: - For Google Sheets: ``` https://www.googleapis.com/auth/spreadsheets ``` - For Google Drive: ``` https://www.googleapis.com/auth/drive ``` - Save and continue until completed. 5. **Create OAuth Credentials** - Go to **APIs & Services → Credentials**. - Click **“+ Create Credentials”** → select **OAuth client ID**. - For **Application type**, choose: - **Desktop App** (if testing locally) or - **Web Application** (for production usage). 6. **Add Authorized Redirect URI** - If using **Web Application**, under **Authorized redirect URIs**, add: ``` https://api.n8n.io/oauth2/callback ``` This allows n8n to complete the OAuth flow securely. 7. **Save and Copy** - Once created, you will see your **Client ID** and **Client Secret**. - **Copy both** and save them securely. You will use them when creating credentials in n8n. > **Important:** > Never share your Client Secret publicly. Treat it like a password to your app’s Google API access. ### Why This Matters Without proper Client ID and Secret setup, n8n cannot authenticate your Google account to read or write data. This step forms the backbone of all Google Sheets and Drive automations. ## Step 3: Setting Up Google Sheets Credentials <img src={require('./img/n8n-google-sheet.jpeg').default} alt="Diagram illustrating Nginx's role as a web server, reverse proxy, and load balancer" width="700" height="400"/> <br/> 1. In n8n, go to **Credentials** (from the left sidebar). 2. Click **“New Credential”** → choose **Google Sheets API**. 3. Provide: - **OAuth Client ID & Client Secret** from your Google Cloud Console. - The required **Scopes**, typically: ``` https://www.googleapis.com/auth/spreadsheets ``` 4. Click **Connect**, authenticate with your Google account, and grant permissions. > **Tip:** > Ensure you have created OAuth credentials in Google Cloud with **“Desktop App”** or **“Web Application”** as the app type, and added: > ``` > https://api.n8n.io/oauth2/callback > ``` > as your redirect URI. ## Step 4: Setting Up Google Drive Credentials <img src={require('./img/n8n-drive.jpeg').default} alt="Diagram illustrating Nginx's role as a web server, reverse proxy, and load balancer" width="700" height="400"/> <br/> 1. Similarly, in **Credentials**, click **“New Credential”** → choose **Google Drive API**. 2. Use the **same OAuth Client ID and Secret** if you want both Sheets and Drive under the same project. 3. Select scopes such as: ``` https://www.googleapis.com/auth/drive https://www.googleapis.com/auth/drive.file ``` 4. Click **Connect**, authenticate, and grant permissions. > **Note:** > If you want to keep Sheets and Drive separate, you can create a new OAuth credential specifically for Google Drive. --- ## Further Reading For detailed guidance on setting up Google credentials in n8n, refer to the official documentation: [n8n Google Credentials Setup Guide](https://docs.n8n.io/integrations/builtin/credentials/google/) ## Conclusion With the Schedule Trigger and Google credentials set up, you can now automate tasks like: - Daily report generation in Google Sheets - Syncing files between Google Drive and Sheets - Archiving old files automatically This foundational setup opens the door to countless automation possibilities, saving you time and effort in managing your Google services.